The Dynamic Host Configuration Protocol (DHCP) server dynamically assigns an IP address and other network configuration parameters to each device on a network. DHCP reservation is a permanent IP address assignment. It is a specific IP address within the DHCP scope that is permanently reserved for a specific DHCP client.
This step-by-step tutorial covers how to Configure IP Reservation on Dynamic Host Configuration Protocol (DHCP). In order to Configure DHCP Reservation in Windows Server 2022, you will need the MAC address information of the client device.
Server demo environment
- Computer Name: server1.test.com
- Operating System: Windows Server 2022 Datacenter
- IP Address: 192.168.3.3
- DHCP Scope: 192.168.3.150 to 192.168.3.200
Prerequisite Required
- Install and configure Dynamic Host Configuration Protocol (DHCP)
- Create DHCP Scope
Backup DHCP Server
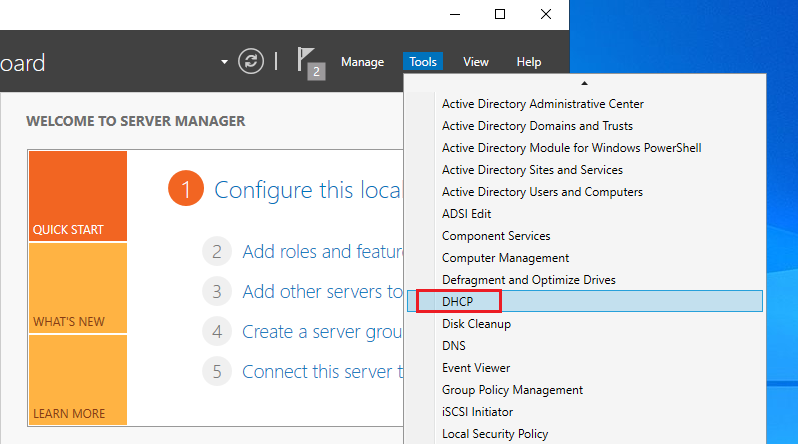
1. Open the Server Manager dashboard, click Tools, and select DHCP.
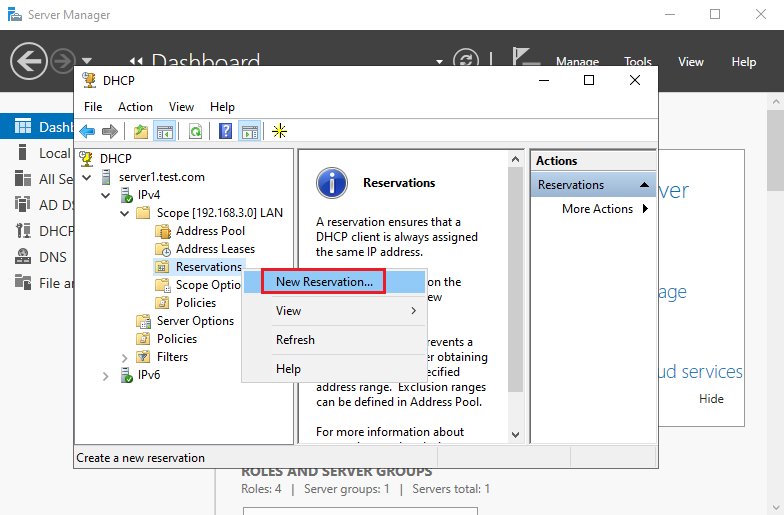
2. Open Scope right-click on Reservations and select New Reservation.
3. Enter Reservation name (specify the network name of the device), Enter IP address (specify the IP address from your DHCP scope that you want to assign to the device), Enter MAC address (MAC address of the client machine) and click Add.
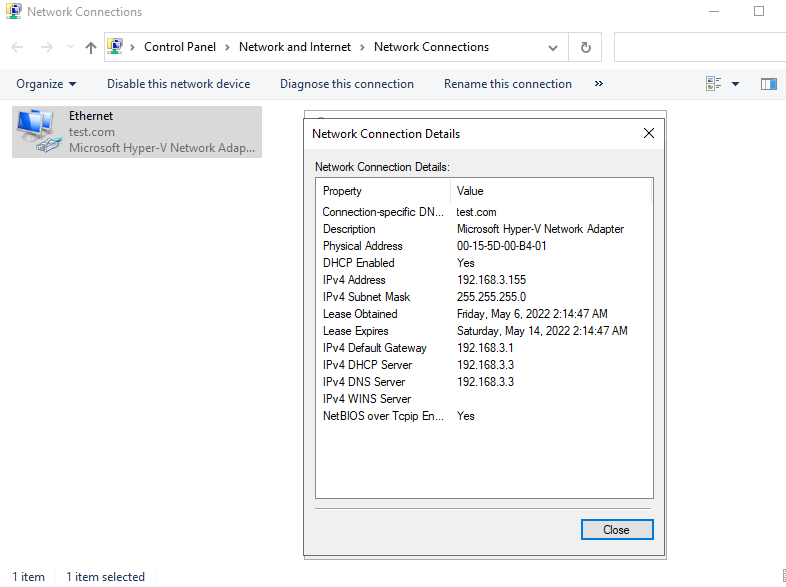
- The MAC address of the Windows device can be found using the ‘
Ipconfig /all’ command.
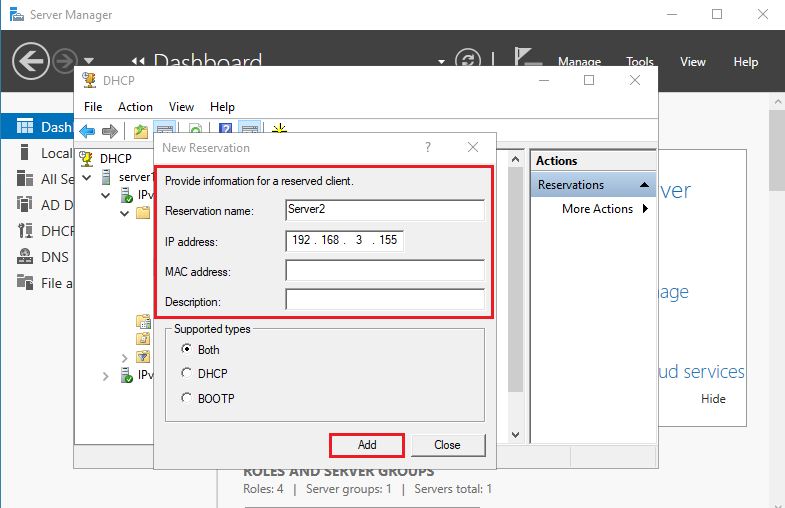
DHCP Reservation has been configured, restart the client device for which we have created a reservation.
Windows devices command prompt commands
- ‘
ipconfig /release’: Release the existing IP address - ‘
ipconfig /renew’: Renew an IP address
Client Demo environment
- Computer Name: server2.test.com
- Operating System: Windows Server 2022 Datacenter
The IP address is assigned by DHCP (Dynamic Host Configuration Protocol) by default. Make sure the client and the server are on the same network.
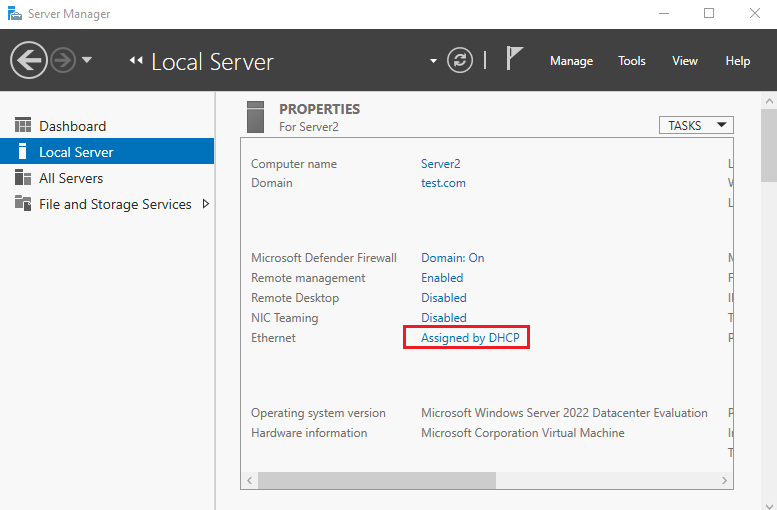
4. Open Server Manager Select the local server, and Click Assigned by DHCP.
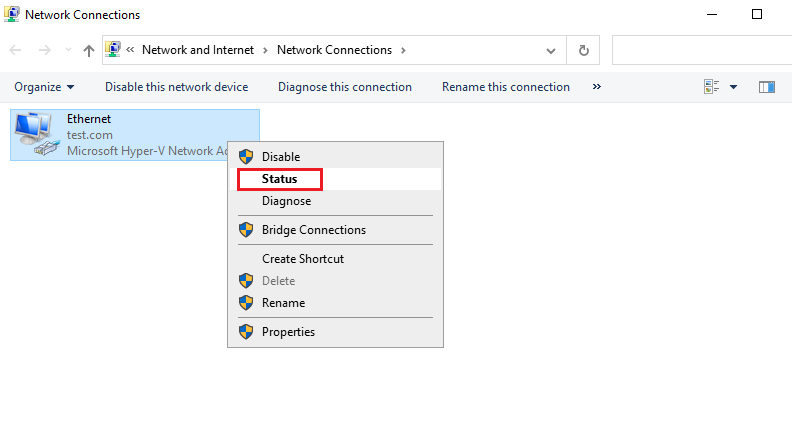
5. Right-click on the Ethernet adapter and click Status.
6. Click Details for Network Connection Details.
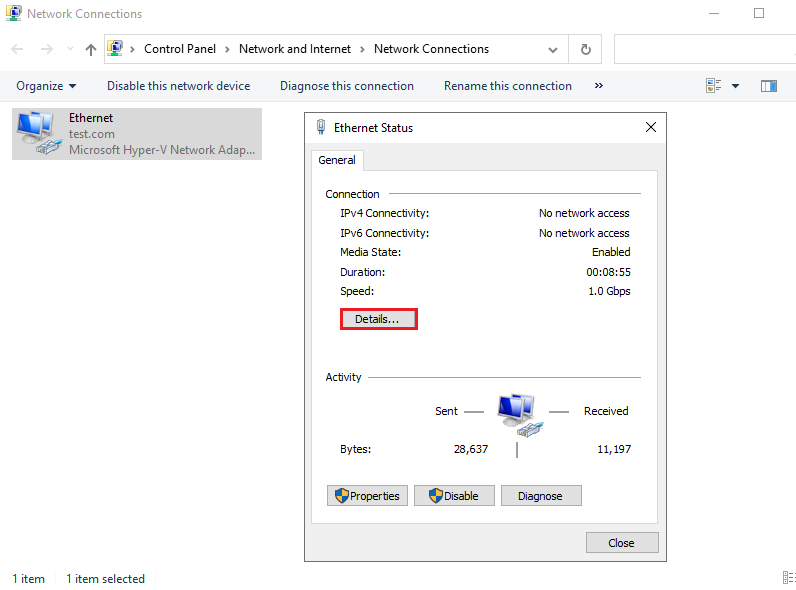
7. Verify the IP address and click Close.
